Probably one of the most productive things I’ve done this quarantine is to upgrade my rig. The one which I’ve been using since 2014 needed an upgrade, and with no end in sight for the quarantine period, gaming has become a big part of my daily activity. As a high-risk individual for COVID19, I’m determined to stay at home as much as I can. Yes, apparently I do still want to live. Rather, I don’t want to die for a stupid reason lmao.
This was a joint project between me and my brother who was also looking to build his own PC. We’ve decided that a PC is better than a laptop in this climate and since we had the same goals and budget, we decided on twin builds to make buying the components easier.
I know the basics of building a computer from my 2014 build, but I haven’t actually applied this knowledge. The old rig was pre-assembled at a computer shop. This time, I decided to take the risk and do it myself since I was going to get the components from different sources.
So let’s dive into the components and the thought process that went into selecting each one:
Motherboard & CPU
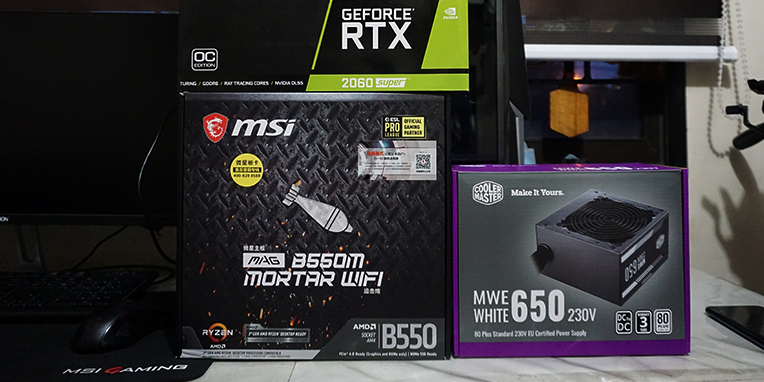
These were being sold as a set and it was a bit of a risk at first because it was from an online seller (Much thanks to my friend, JD, for recommending this FB page). But after getting the seller’s personal identification as well as seeing the legit reviews, I pulled the trigger. We got the AMD Ryzen 5 3600 and the MSI MAG B550m Mortar WiFi.
The decision to go with AMD was purely because of the good news I’ve been hearing recently about them. Upon doing some quick research, the 3600 seemed to be a good choice for rigs at my budget. And when I checked on my brother for his preferred CPU, the 3600 was also his target.
As for the motherboard, we settled with the B550 because it didn’t require an update to the BIOS to run the 3600 as compared to the B450. Another good thing about the B550 is that it is forwards compatible with the next generation of AMD CPUs so if ever we plan to upgrade, it is possible. The motherboard also has a built-in WiFi receiver so no need to purchase an external dongle or WiFi card.
This was a pretty straightforward and lucky choice. The most important thing is to make sure that your CPU is compatible with your motherboard. And finally, choose the motherboard with built-in features that you want.
Memory
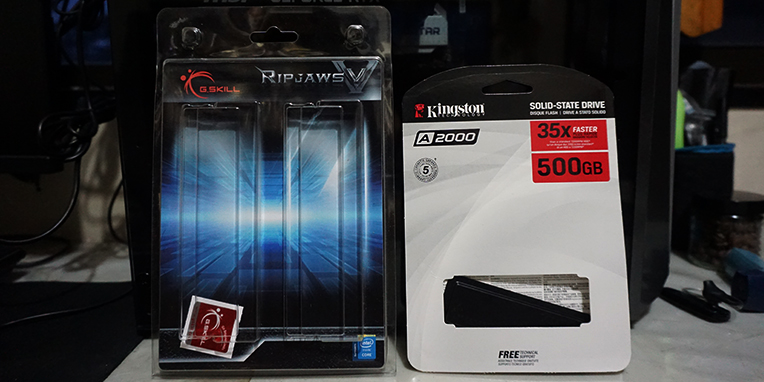
This was another straightforward purchase. My brother and I decided on the G.SKILL Ripjaws V 16GB (8GB*2) 3200MHz DDR4 RAM. It just seemed like the most bang-for-your-buck option as well as the one with good reviews.
For RAM, the important thing is to use dual-channel to your advantage. So having two sticks is always better than just one (8GB*2 > 16GB*1, etc.). The motherboard we have has 4 slots so we can still add more if needed. For gaming and streaming, you can probably get by with 8GB, but 16GB is the standard minimum based on my research. There are also RAM Sticks with RGB lights so if that’s one of your priorities, you can go wild.
Storage
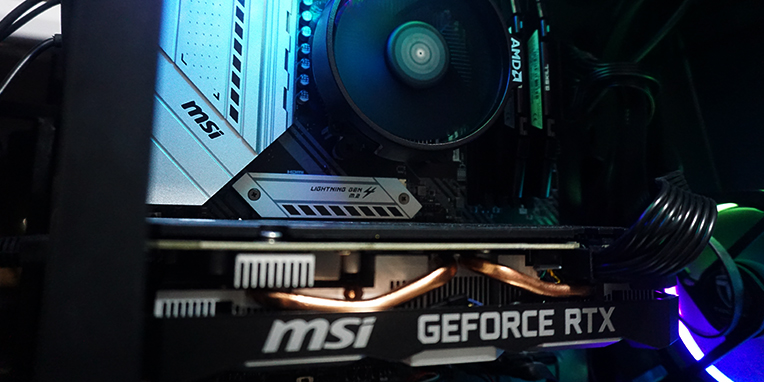
Since I am just upgrading, I will still be using my existing 128GB SSD + 500GB HDD from the old rig. But just in case I will be needing more storage, I bought a Kingston A2000 500GB M.2 SSD. This was installed directly on the motherboard (which has two M.2 slots so yet another upgrade possibility) and used to store the OS and programs I will be using most often.
I’m pretty sure I won’t be using up all the storage anytime soon, but I also have an external HDD ready just in case. Storage isn’t really the most important factor in building a PC and nowadays, HDD and SSD’s are getting cheaper and cheaper. I suggest buying an SSD for the OS because the boot time compared to an HDD is very noticeable. This is the upgrade that you will feel the most immediate. SSD > HDD every time.
Power Supply Unit
The heart of your PC and definitely not something to skimp on. After my brother did the research for power draw, we decided that 650W would be more than enough. It’s always better to go for more Wattage as possible, but don’t forget your budget.
We got the Cooler Master MWE 650 White 230 V2. This was non-modular which I kind of regretted, because cable management was quite stressful. If you have the cash to blow, always go for the modular or semi-modular PSUs to save the hassle. Only go for the non-modular if you’re gonna have a professional assemble your rig or you actually enjoy your time with cable ties.
For PSUs, just go with the tried and tested brands. Personally, I don’t want to experiment with cheaper brands for the Power Supply of my rig, but you do you. Just make sure that it’s 80 Plus Standard certified. And as always, check the warranty and the legitimacy of your seller.
Graphics
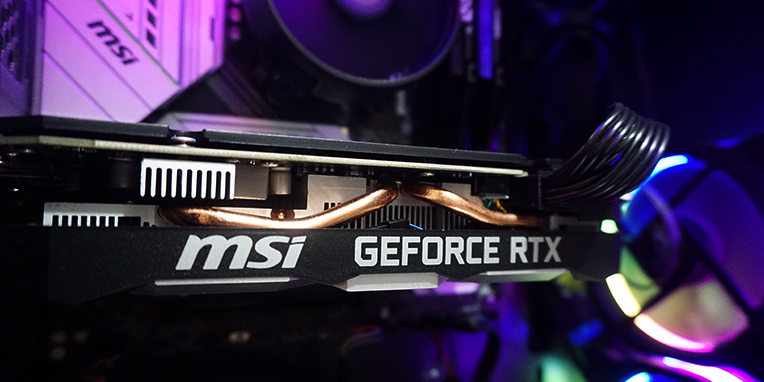
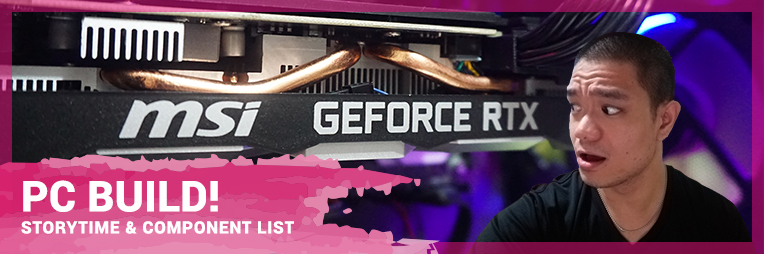
Oh yeah, finally, the big boy. Our original plan was to get an Nvidia GeForce GTX 1660 Ti or a 1660 Super. But then, Nvidia dropped the latest RTX 3000 cards and in a span of a couple of weeks, the prices of the RTX 2000 cards dropped. For the same budget, we were able to upgrade our graphics choice to the MSI RTX 2060 Super Ventus XS 6GB GDDR6.
I have no doubt that if we waited just a little bit more, we could have gotten it for even cheaper, but these were selling like hotcakes and we wanted to complete our builds ASAP. This was the last component to be added to our build and finally getting it was a surreal experience. Imagine walking around with something worth your whole month’s pay.
Choosing a graphics card is mostly dependent on your budget and the kind of games that you will be playing with. To be honest, an RTX 2060 is kind of overkill for someone like me who plays games on medium-high graphics. I’ve never been a fan of ultra settings but at least I know I have the option. In the meantime, it will just run the games easily and not stress too much, hopefully increasing its longevity.
I’ve also seen some comments that for pure gaming, AMD Graphic Cards are superior, but for those who do some video editing and other creative programs, NVIDIA cards are the better choice. For components as expensive as graphics cards, it’s always better to do some research and compare all your available options before deciding on what to buy.
Case & Fans
Another bundle, this case was one of the cheapest options on the store. It’s the Trendsonic Pioneer P107A ATX Case and it already comes with 3 RGB Fans! It’s got a tempered glass window on one side and it’s dark color fits my aesthetic as well. I wasn’t really going for any RGB in my rig, but I can’t say no when it’s free.
This case was big enough to fit a lot of storage as well as the extra cables from my non-modular PSU. However, it’s better to just tuck and forget the cables on the other side and never mention them again.
When choosing a case, it’s more dependent on the size of your motherboard. Also make sure that the case has enough clearance for your graphics card because some cards nowadays can get a bit bulky. Once again, it’s all about compatibility, then features. And of course, consider the aesthetic because you’re gonna be looking at your case for a long long time (at least I will be).
Assembly
For the assembly, I followed Linus Tech Tips and Bitwit‘s videos. If you’re unsure about something, just go ahead and search it on YouTube. Chances are, someone’s already had the same problem and solved it. This process was absolutely nerve-wracking. I have sweaty hands so that just made things worse.
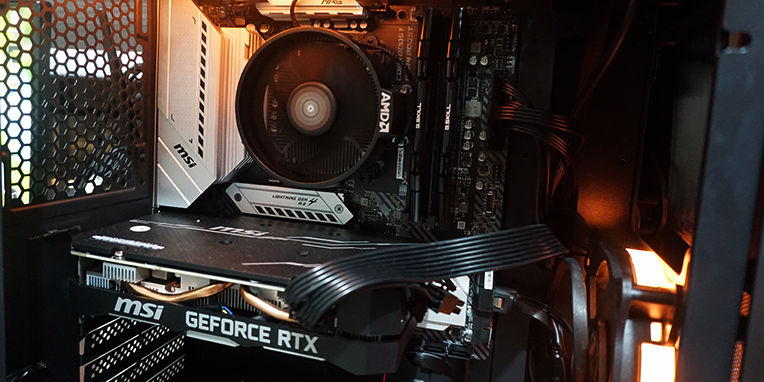
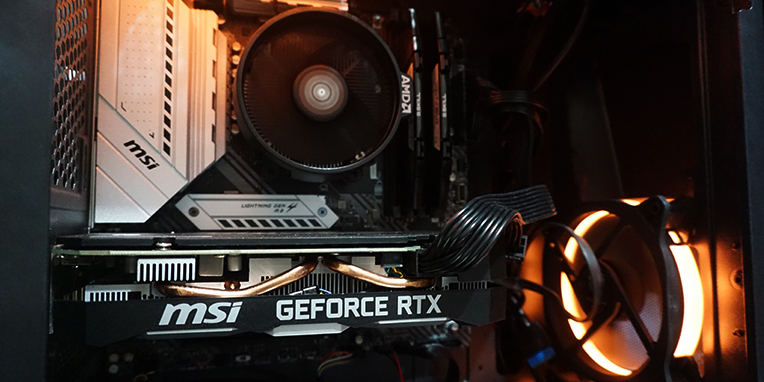
After a few hours of screwing and unscrewing (I made a mistake on the motherboard standoffs, the screws to use for the standoffs, and installing the CPU cooler properly), I was finally able to finish assembling the components into the case. The last part was sliding the graphics card into its slot.
After hearing the click, it was time to plug in the PSU cable, attach a keyboard and monitor, and wait for it to boot.
My armpits were sweating so much at this point.
And finally, we reached the BIOS.
After checking that everything was in order, I breathed a huge sigh of relief. Thank you, Lord. Everything was running smoothly. All that was left was to install the OS, manage the boot order, and I was finally on the familiar Windows screen.
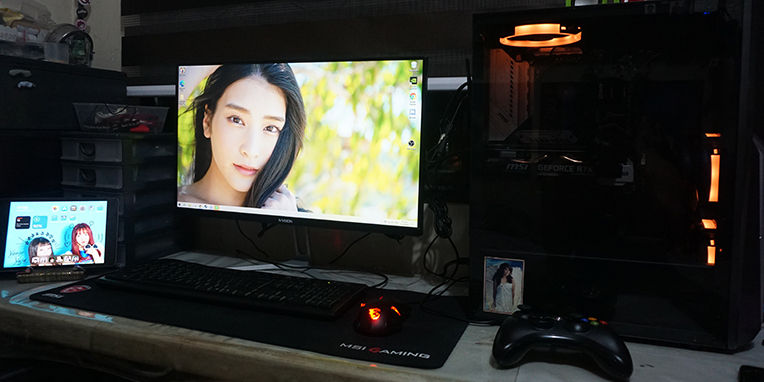
I updated the drivers, installed the usual programs, checked that all my old files were still there, and made some changes in the Windows settings. And now, here I am, writing this blog in between playing The Witcher 3 and watching K-pop marathons on YouTube.
I’ve also done some video editing on this PC and I’m happy to say that everything runs smoothly (so far). It’s even on par with my work laptop that costs more than double of what I spent on this one. I haven’t done some solid benchmarks for it yet, but everything runs super smoothly and that’s good enough for me.
Conclusion
Building a PC yourself is definitely an extra challenge. It takes a lot of effort compared to just buying a pre-built one, but it also has its benefits, if you are willing to put in the time (and stress). Firstly, you get the power to choose all the components, as well as which sellers to buy them from. This can lead to immense savings, especially if you’re one to keep an eye out for promotions and sales. Getting the exact component you want means no compromise and you get exactly the rig you want.
But really, there’s nothing like the feeling when the computer finally runs smoothly after knowing you built it yourself. The satisfaction washes away the stress IF everything goes according to plan. Thankfully, in my experience, it did.
Recap of Components:
CPU: AMD Ryzen 5 3600
Motherboard: MSI MAG B550m Mortar WiFi
Graphics: MSI RTX 2060 Super Ventus XS 6GB GDDR6
Memory: G.SKILL Ripjaws V 16GB (8GB*2) 3200MHz DDR4 RAM
Storage: Kingston A2000 500GB M.2 SSD
Power Supply: Cooler Master MWE 650 White 230 V2
Case: Trendsonic Pioneer P107A ATX Case (Free 3x RGB Fans)
Budget: P50,000 – P55,000
And there we have it. Another life goal accomplished. Hopefully this build will last me for the rest of my life.

Thanks for reading! If you have any comments or questions, just let me know! And if you haven’t heard yet, I’ve recently made a YouTube channel for the videos I’ll be editing with this PC! Check it out and drop a subscribe if you like. Every interaction is much appreciated to help me make better content.
Keep creating and stay safe indoors!
-jgzn
